Chickpea microgreens are hearty, protein rich and surprisingly easy to grow at home. They sprout quickly, produce sturdy shoots and have a pleasant nutty flavour that works well in both raw and cooked dishes. This guide explains how chickpea microgreens grow, what they need, how to care for them and how to troubleshoot potential issues. The method section gives clear steps that beginners can follow confidently.
Chickpeas germinate very reliably and require only basic conditions to grow well. They adapt easily to indoor environments, do not need specialized equipment and reward you with a generous harvest in a short amount of time.
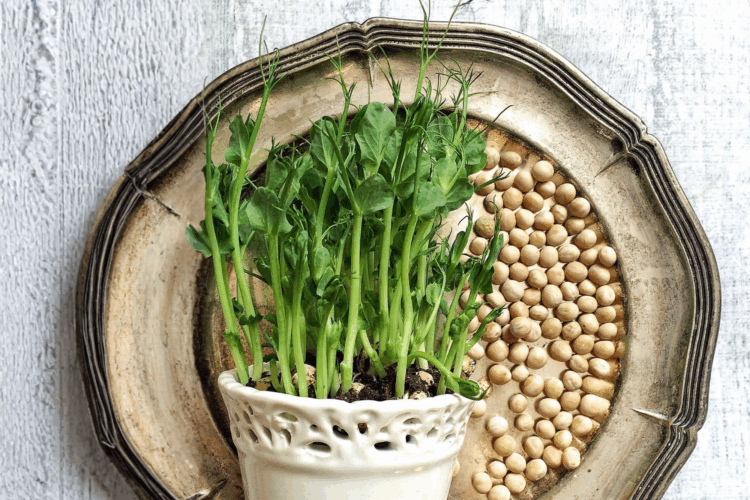
Understanding Chickpea Microgreens
Chickpeas come from the Cicer arietinum plant, a legume known for its robust seeds and balanced nutrient profile. When grown as microgreens, chickpeas are allowed to sprout and develop short stems and their first set of leaves, which results in a more flavorful and nutrient dense stage compared to basic sprouting.
Unlike sprouts, which are grown without light, chickpea microgreens grow on a medium and receive light exposure. This strengthens the stems, enhances chlorophyll development and produces a vibrant green crop. Their taste is pleasantly mild and slightly earthy with a firmer texture than many other microgreens.
To grow chickpea microgreens successfully, the seeds need soaking, steady moisture and moderate light. A shallow tray works well because these plants are harvested early.
Benefits and Advantages
Chickpea microgreens are rich in plant based protein, fiber, vitamins and minerals such as iron, magnesium and folate. They are very filling and ideal for people looking to add more protein dense greens to their diet.
One major advantage is that chickpea microgreens grow quickly and produce sturdy shoots. They tolerate minor errors and are well suited for beginners. Chickpeas are affordable, widely accessible and easy to store, which makes this microgreen a reliable staple for home growers.
Culinary Use and Storage
Chickpea microgreens have a hearty texture and are excellent in salads, wraps, sandwiches, grain bowls and savoury breakfast dishes. They can be added to soups or stir fries shortly before serving. Their mild flavour pairs well with lemon based dressings, smoky spices and creamy sauces.
To store chickpea microgreens, place them in an airtight container lined with a slightly damp paper towel. Keep the container in the refrigerator. They generally stay fresh for two to three days. For the best taste and texture, harvest only what you need at a time.
Care and Maintenance
Chickpea microgreens need consistent but not excessive moisture. The seeds expand significantly during soaking and must be kept on a damp, well drained growing medium. Water with a spray bottle to avoid over saturating the surface.
Provide bright indirect light once the seeds sprout. Too much direct sunlight can dry the medium quickly or cause uneven growth. Rotate the tray regularly so the microgreens grow upright.
Fertilizer is unnecessary because chickpeas contain their own nutrient reserves for early growth. After harvesting, the used medium can be composted or added to outdoor soil.
Good to Know
Chickpeas swell considerably when soaked and may crack slightly. This is normal and often helps accelerate sprouting. When the roots appear, you may notice fine hairs along the root surface. These are healthy root hairs, not mold.
Chickpea microgreens tend to grow taller and thicker than many other microgreens. Their stems and leaves become firmer as they develop, so it is best to harvest them while they are still young and tender.
Because chickpeas are larger seeds, they require more spacing than small seed microgreens to prevent overcrowding.
Common Issues and How to Address Them
If the seeds are not sprouting evenly, check the soaking duration. Under-soaked seeds germinate more slowly. Ensure you soak them long enough to become fully hydrated.
If mold appears, it usually means excess moisture or poor ventilation. Reduce watering, improve airflow and avoid stacking trays.
If the microgreens look pale or stretched, they are not receiving enough light. Move the tray to a brighter location or increase exposure to indirect light.
If the growing medium smells sour, it is likely waterlogged. Allow it to dry slightly and adjust watering frequency.
Tips for Success
Soak chickpeas for eight to twelve hours before sowing. This ensures fast and uniform germination. Spread the soaked seeds evenly but leave small gaps between them so they have space to grow upright.
Keep the tray covered for the first day to promote humidity and strong sprouting. Once the shoots appear, remove the cover and expose them to indirect light.
Mist the microgreens lightly rather than watering heavily. Harvest early for the best flavour and texture, preferably when the first leaves are open and the stems have reached a moderate height.
How to Grow Chickpea Microgreens at Home
Items Required
- A shallow tray or growing container
- Potting mix, cocopeat or another microgreen medium
- Whole chickpeas
- Spray bottle
- Scissors for harvesting
Instructions
1. Rinse the chickpeas thoroughly and soak them for eight to twelve hours until they are plump.
2. Prepare your tray by adding a thin, even layer of growing medium.
3. Moisten the surface with a spray bottle until it feels evenly damp.
4. Spread the soaked chickpeas across the surface, leaving small gaps between each seed.
5. Mist lightly and cover the tray with a lid or cloth for the first day.
6. Check daily to ensure the medium remains moist. Remove the cover once the seeds sprout.
7. Place the tray in bright indirect light and rotate it regularly.
8. Mist the microgreens once or twice a day depending on room conditions.
9. Harvest in about five to seven days when the shoots are tall and the first leaves have opened. Cut just above the growing medium.
10. Rinse gently before use and store extra microgreens in an airtight container in the refrigerator.